Right around this time a year ago, the reality that we were going to be in a lockdown for a long time was settling in. Fortunate to be in a job that is, for the most part, remote friendly, I started to look at options to improve my webcam setup. If I was going to be on camera for big chunks of the day, every day, I might as well look good. Or probably more accurately, given the fact that my own daughter once said that I looked “old and busted,” a little more professional. To be fair, she was two and a half at the time. But she also wasn’t wrong.
Anyway, the problem was that this epiphany on my part arrived considerably after millions of people the world over had already had the same epiphany, so pretty much all of the upscale but not crazy expensive webcams were sold out. I was willing to invest, but not spend much money doing it because in April it still looked like I might be back on planes by October. November, at worst.
Yeah.
Fast forward to February. Having not gotten on a plane in October or November, or December or January for that matter, I began to have second thoughts about the moderately priced webcam I’d eventually tracked down. I was not going to be traveling this spring, quite clearly, and even the fall is at this point uncertain. In the back of my mind, then, I began to rethink my camera options.
Then one day a few people in our local tech Slack began discussing their camera setups – some of which included real, actual cameras, DSLRs. DSLRs exactly like the one that had been sitting in our RedMonk offices, unused, for well over a year. So I started reading. And asking questions. And watching an unholy number of YouTube camera-as-webcam how to videos.
Which lead to today, and to my comically over-engineered camera rig. A camera rig which has, for better or worse, elicited enough comments and questions from people that I felt compelled to write all of this up, if only as a warning. For those of you are thinking about your camera setups, then, this is for you. Read it. Especially the part where I tell you not to do this.
With that, herewith is SOG’s Guide to a Fancy Camera rig.
The Warning
I don’t usually do this with my how to’s, but as this endeavor is expensive both in dollars and time, let me first try and talk you out of doing this.
- Having a fancy camera rig was – for me, at least – an enormous time sink. Some of it was the challenges of my setup: I’m in a windowless basement, so my lighting situation is a nightmare. Some of it is the fact that I took it well beyond just the camera, as I’ll get to; Luis stopped there and has a different attitude about all of this. Some of it was my complete lack of knowledge; I know nothing about photography, nothing about lenses and – especially – nothing about lighting. I also barely understand video software, CODECs, cables and so on. And while there are a wealth of resources to educate yourself on all of the above, it takes time. So that’s strike number one.
- A fancy camera rig, like a lot of fancy things, can be expensive. I lucked out, because the most expensive piece of equipment necessary – the camera – I already had. The same was true for less expensive pieces of equipment that still add up, like a wired mic. If you go down this route without any of the necessary equipment already on hand, be prepared to drop some serious cash. Matt Mullenweg wrote about his setup here; the headphones alone are $1500. You don’t have to spend that, of course – I just use my old Jabra Elite 65t’s that are under a $100 now – but the point stands: this is not cheap to do. Strike two.
- Maybe the biggest reason not to do any of this is the daily overhead. DSLRs don’t just turn on like a webcam does. Mine has to be turned on, and then triggered to start shooting. It’s minor stuff – if you don’t bother with the teleprompter, anyway – but even the simpler setups are fiddly and will add friction to every call you use them on. Which is what should have been, but somehow was not for me, strike three.
In short, then, I recommend not going down this path. When you see someone on a video call with an impressive bokeh-ed image, just let it go and call yourself lucky. It’s not too late to save yourself.
If you can’t do that, then I will – with reluctance – walk you through my setup.
The Camera
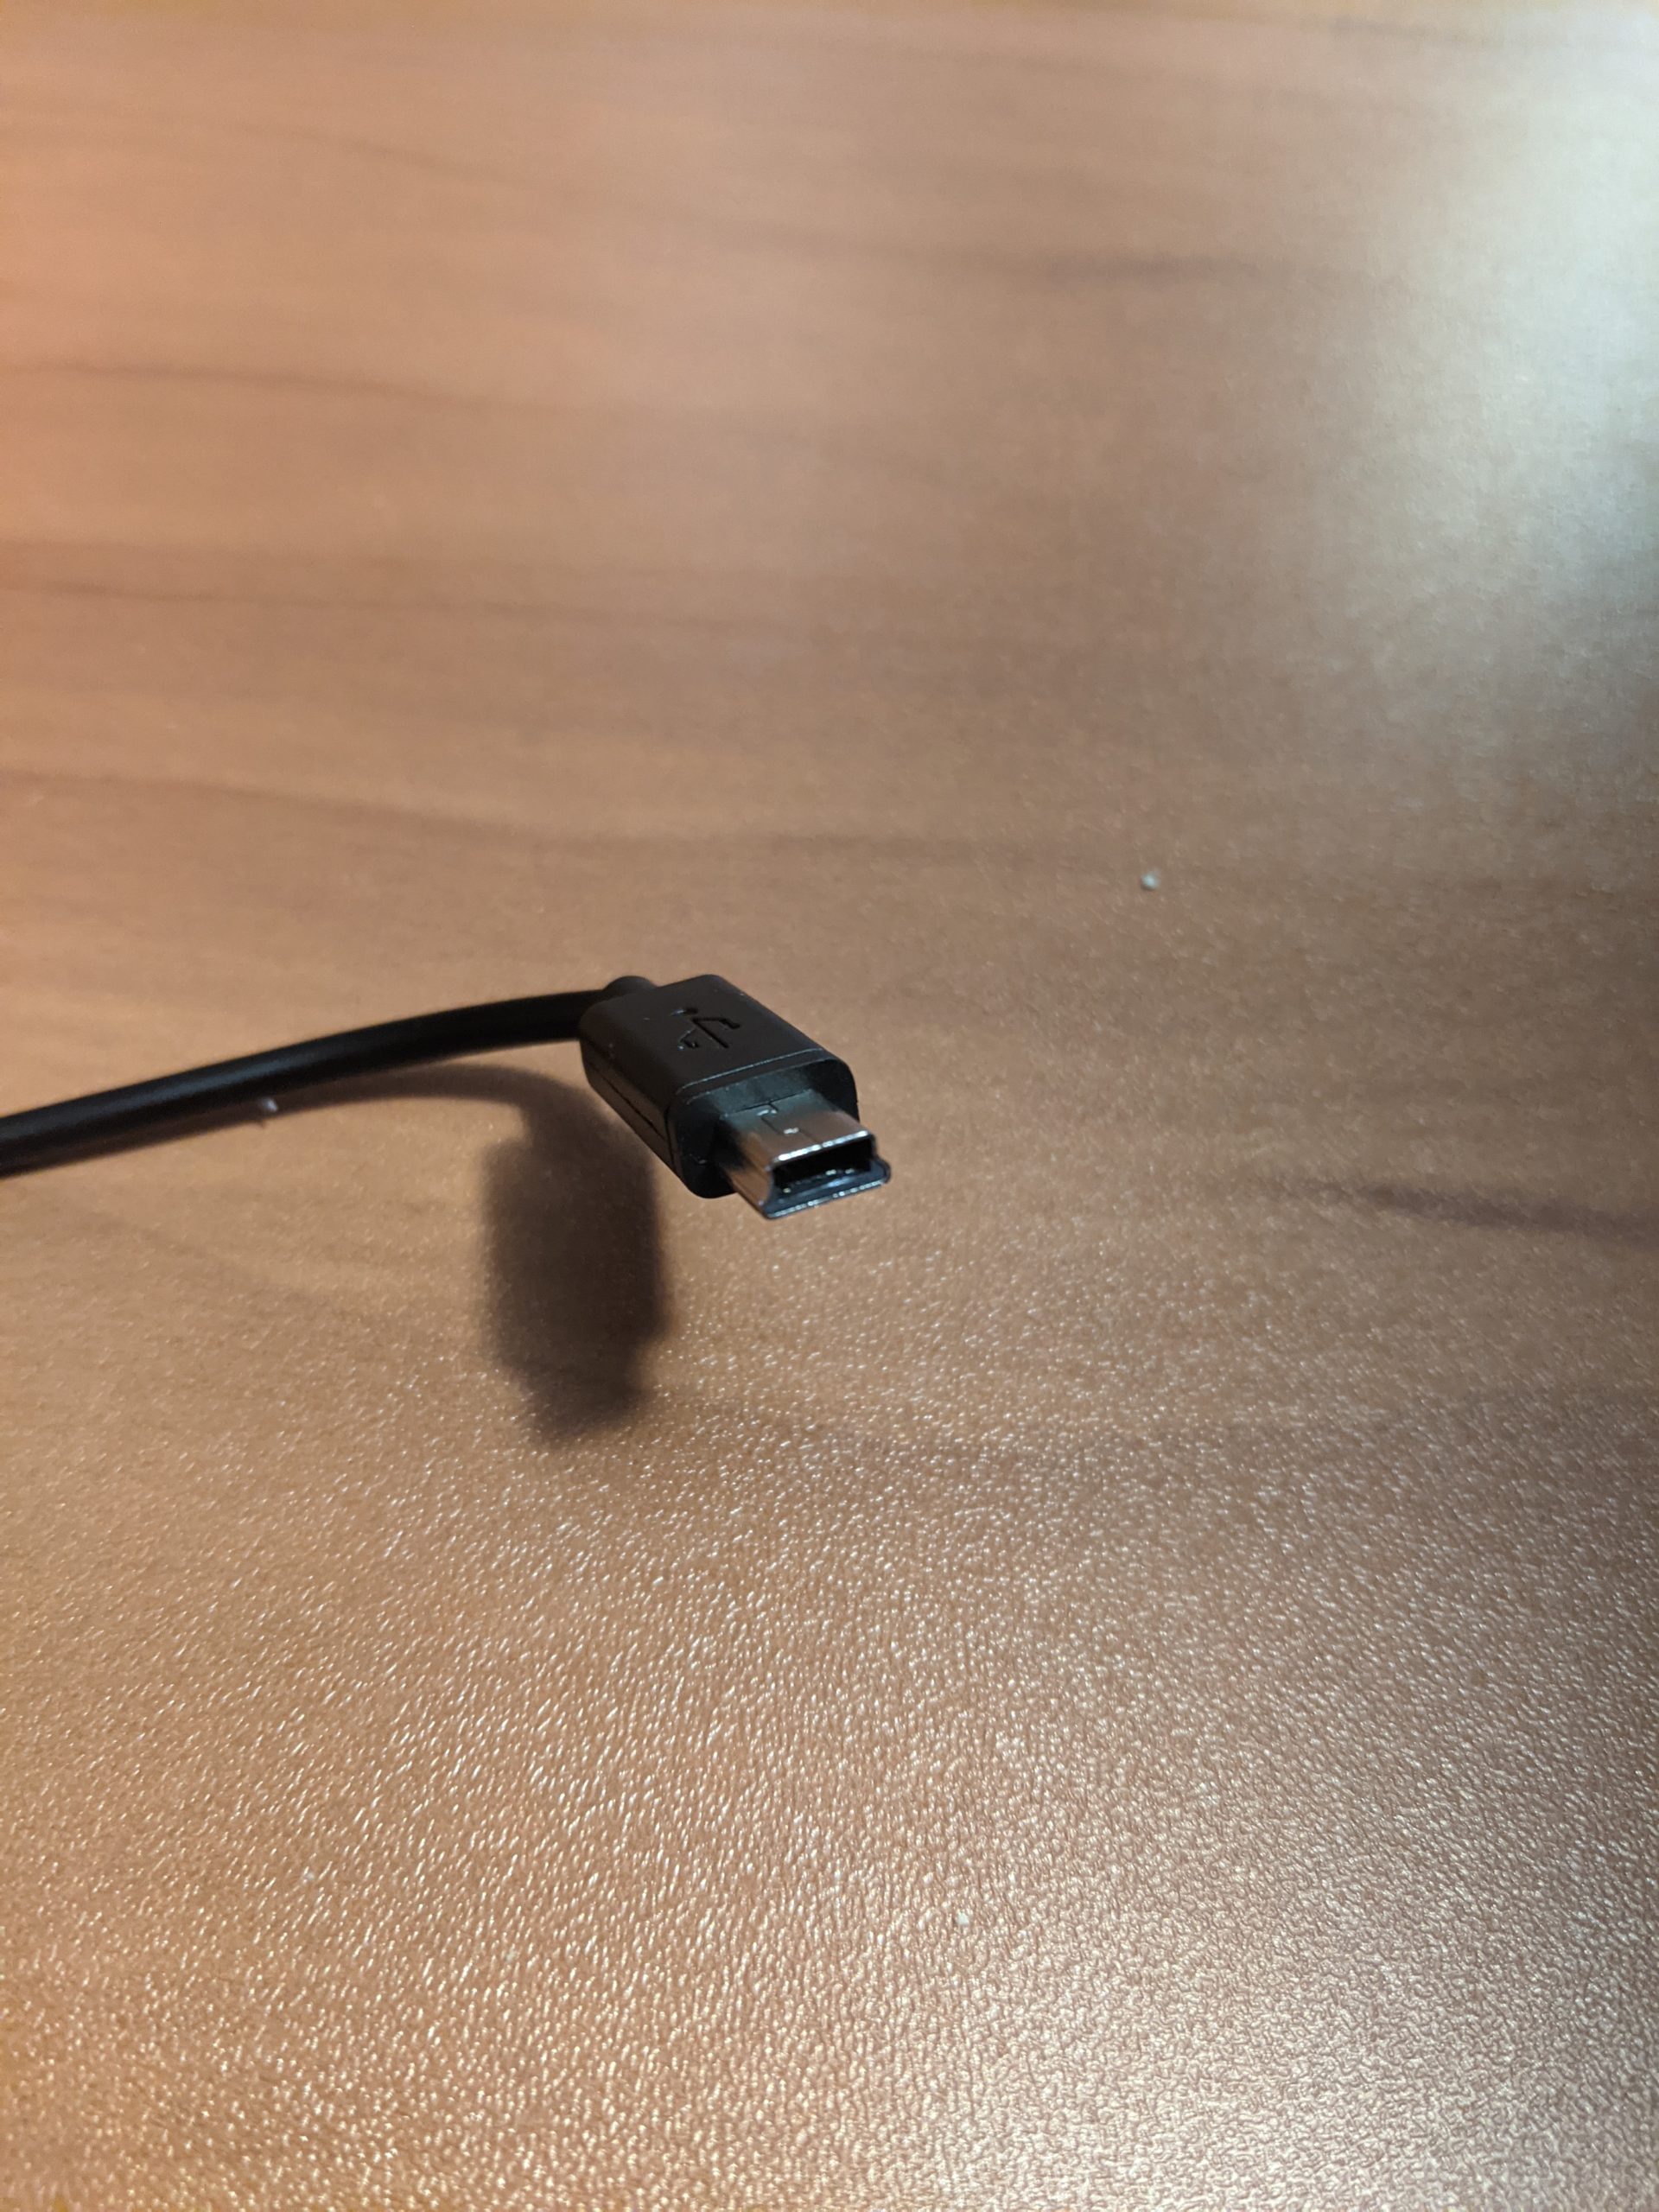
Selecting the camera was easy enough, because it was the one we had on hand. In my case, it’s a Canon EOS 7D. Canon, like a few of the manufacturers, actually makes it easy to support a DSLR as webcam. They provide software for that here; it’s a snap to use if your camera is supported. Oh, with one complication. If your machine is old enough to not support HDMI, as mine is, you might have to use a mini USB cable. And if you’re like me, you have dozens of the ubiquitous micro USB cables, but zero mini USB cables – the ones with a crimp in the sides (see below). The good news is that they’re cheap.
Speaking of cables, one of the things you’ll have to do if you’re using a DSLR as a full time webcam is finding an AC adapter that will slot into the battery compartment. I swapped batteries while I was waiting on cables, and trust me, you don’t want to do that. For the 7D, this came in two parts – an AC adapter and a DC battery coupler, both of which were a) hard to find and b) surprisingly expensive.
The only real issue I had with the camera was that the 7D is old enough that autofocus isn’t supported for video, so that I have to make sure to stay in focus. Which brings me to…
The Lens
A lot of it depends on your particular setup – how far away the camera will be, for example – but after trying a few, I ended up using a 28mm 1.8 lens that I had on hand. I had to bump the f-stop (that means the aperture, but don’t ask me to explain how it works) of 1.8 back to ~2 because as close as I was, the depth of focus was something like three inches. I determined that using this site, by the way. Pop in the camera, lens, f-stop and distance and it’ll give you precise depth of field. If I leaned back or forwards, then, I was out of focus. The 2 still gives me a decent bokeh effect, blurring the background, but also gives me a bit more room to move on longer calls.
The Format
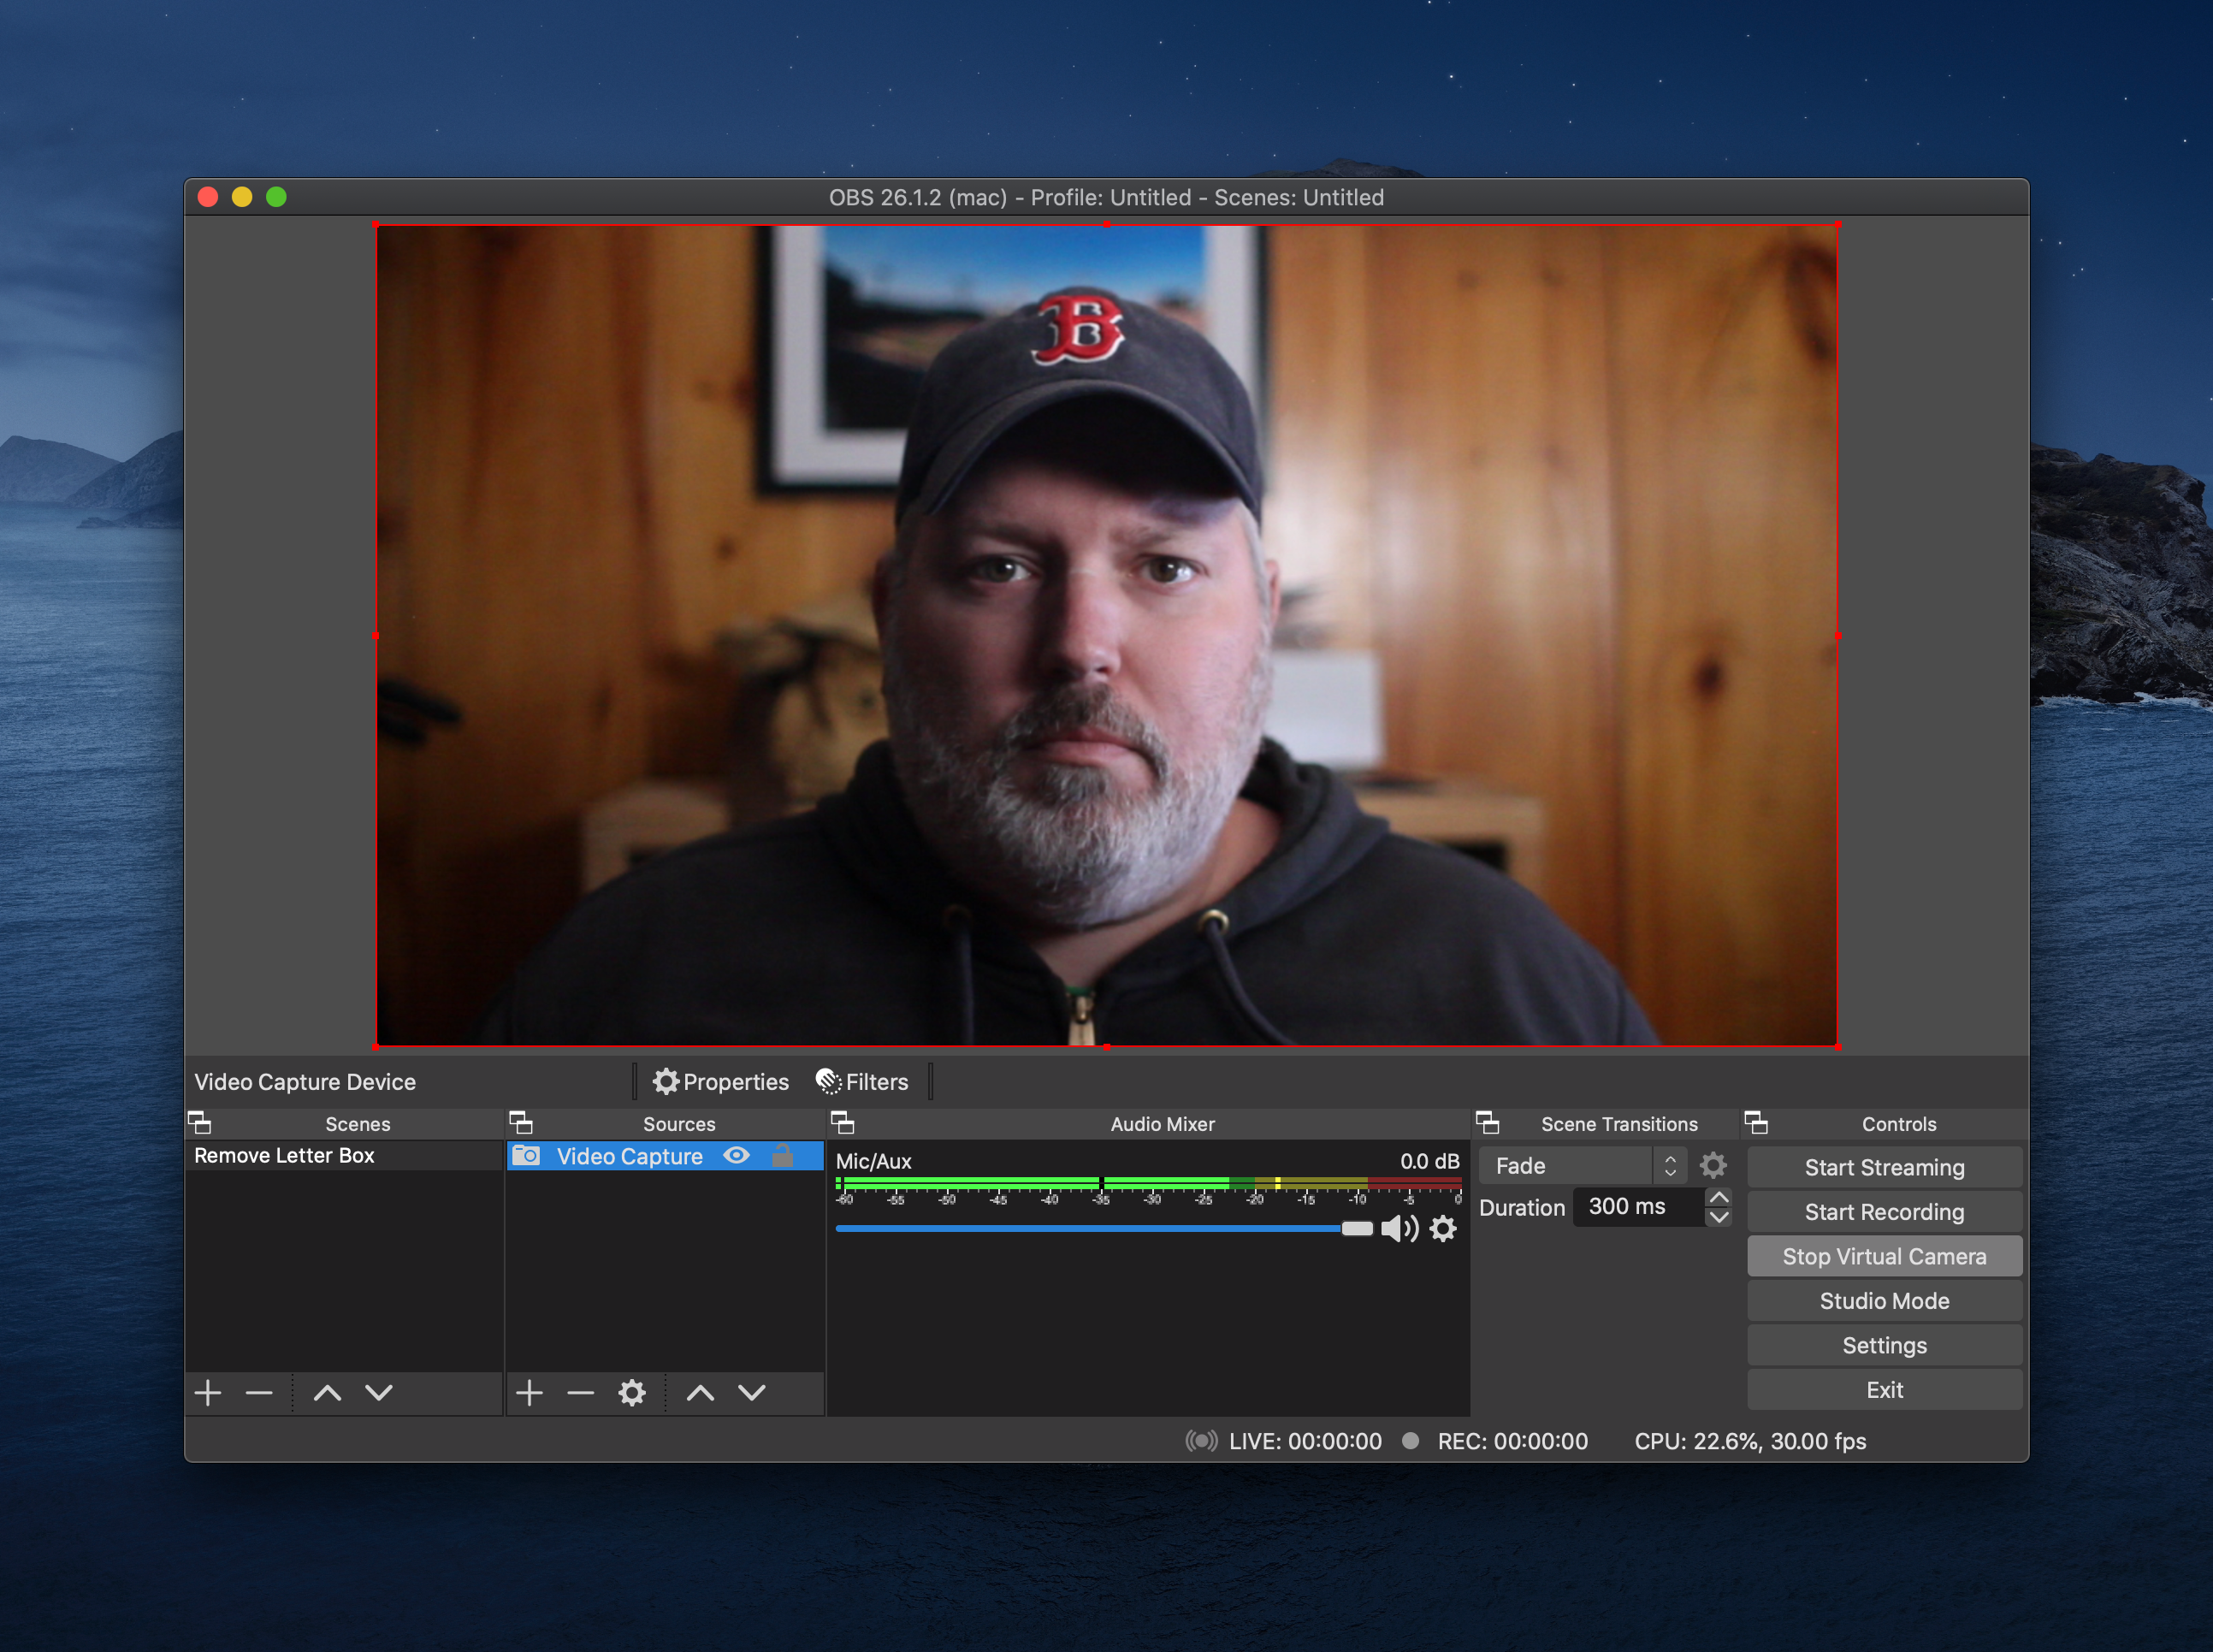
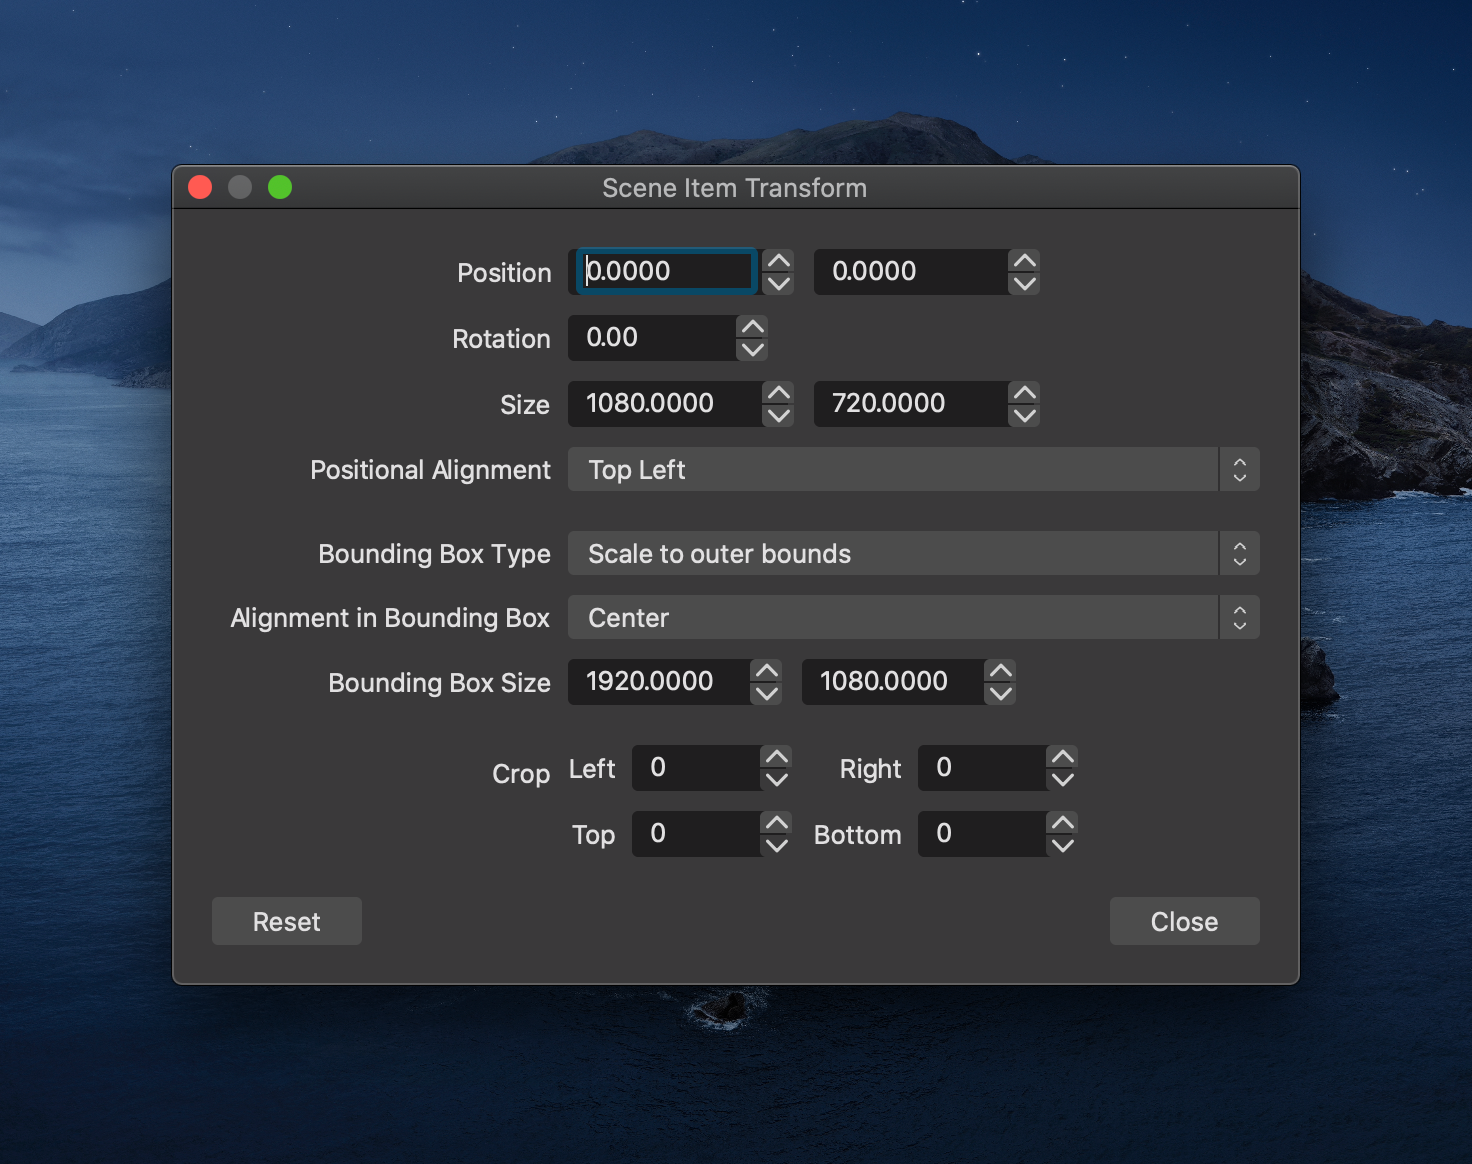
One of the things that I noticed, and initially ignored because I didn’t want to deal with it, was that the Canon and EOS Webcam software letterboxed the feed, meaning that it had a 4:3 image with big black bars on each side. While I had staunchly resisted getting into OBS – Open Broadcast Software, for those of you fortunate enough to not have gone down this rathole – a conversation with Robert Reeves alerted me to the possibility that I could pass the EOS Webcam feed through OBS and drop the letterboxing, resulting in a profile like so.
These are the settings I used to do that:
The Placement
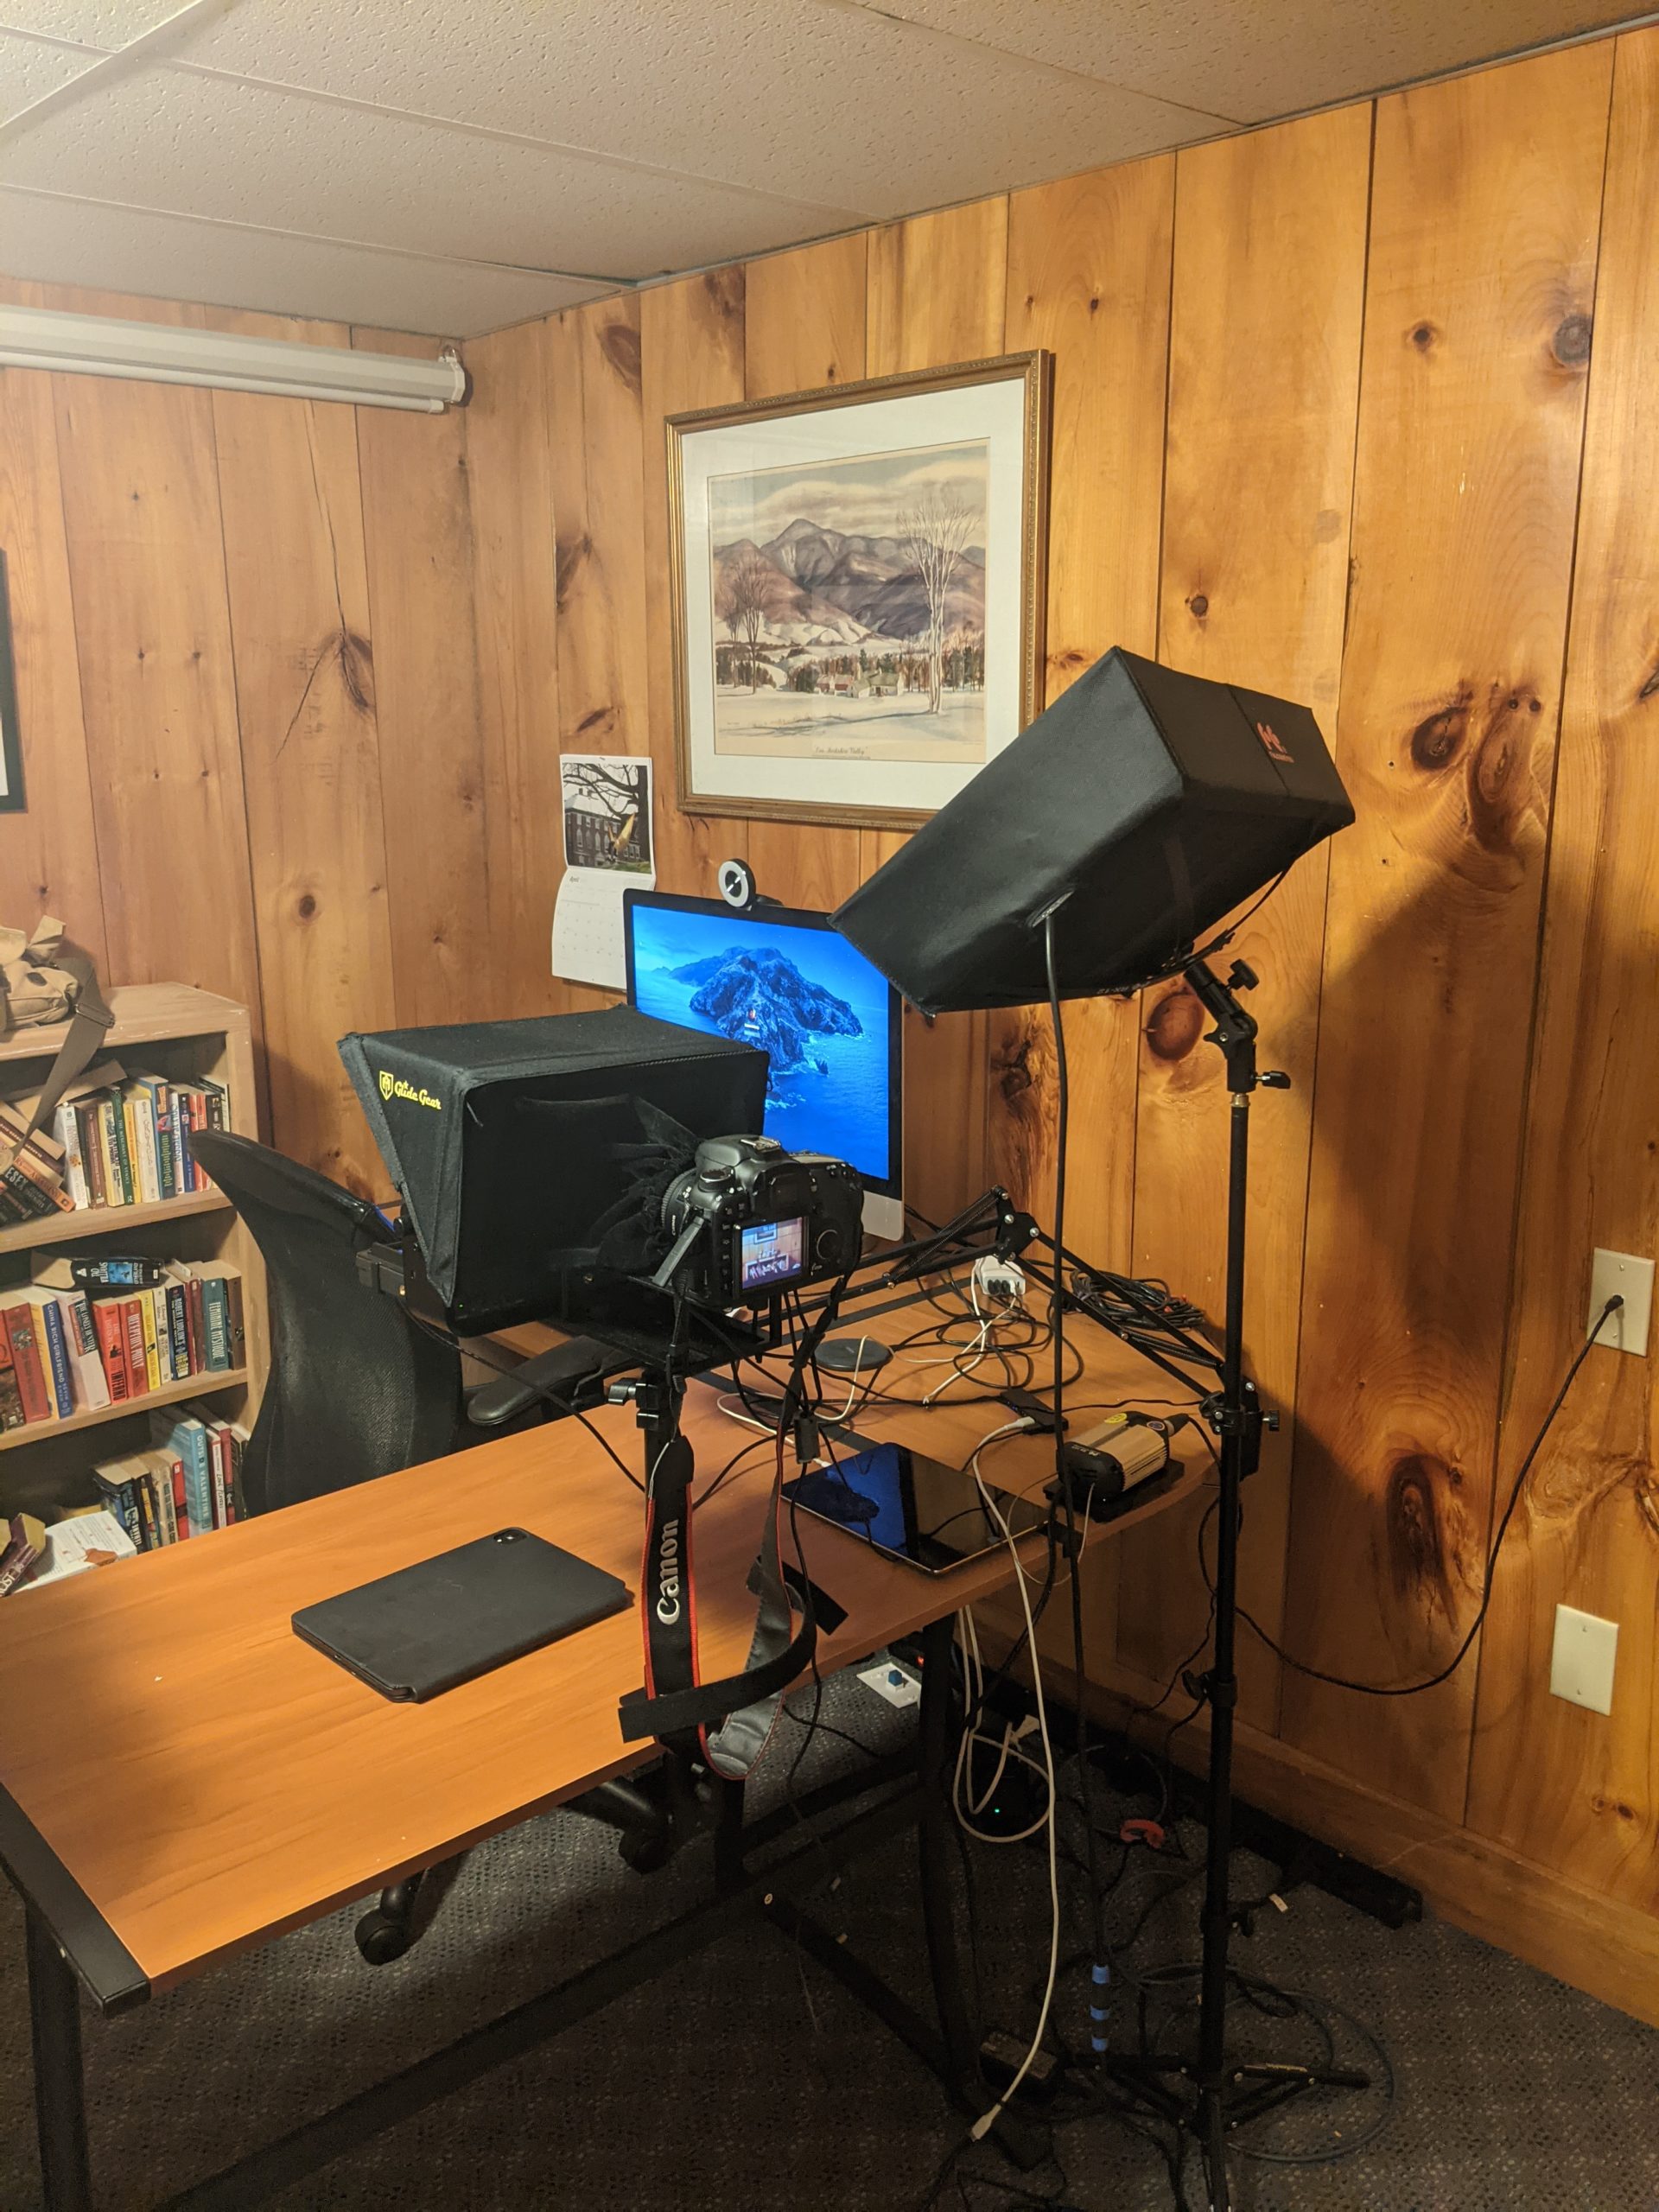
I experimented with a wide variety of setups for placement of the camera – it’s a time sink, remember? Not only did we have a camera at the office, we had tripods. I tried above my desktop, and then to the right of it. Ultimately, however, I discarded the tripods not because they wouldn’t work, but because I have a five year old. Instead I got this desk mount.

The question then was where to put it. I didn’t want it above or off to the side of my computer, because then I’d constantly be going back and forth. What I needed was a solution where the camera and screen would be the same place, such that looking at one was looking at the other. Which brings us to:
The Teleprompter
When one of the people from our tech Slack originally mentioned a teleprompter, my original reaction was: that’s not for me. My understanding of a teleprompter was that it was something that you’d read words off of while giving a talk, and I never script my talks. It turns out that my limited impression of what a teleprompter was for was entirely incorrect.
What it actually is is a one way mirror positioned at a 45 degree angle. The camera sits behind it and shoots through it, and you place a screen underneath it. What this accomplishes, then, is that when you look at the screen, you’re looking at the camera at the same time. As someone who had to constantly remind myself to make eye contact with a camera lens, this was a game changer. My hardware is the Glide Gear TMP 100.
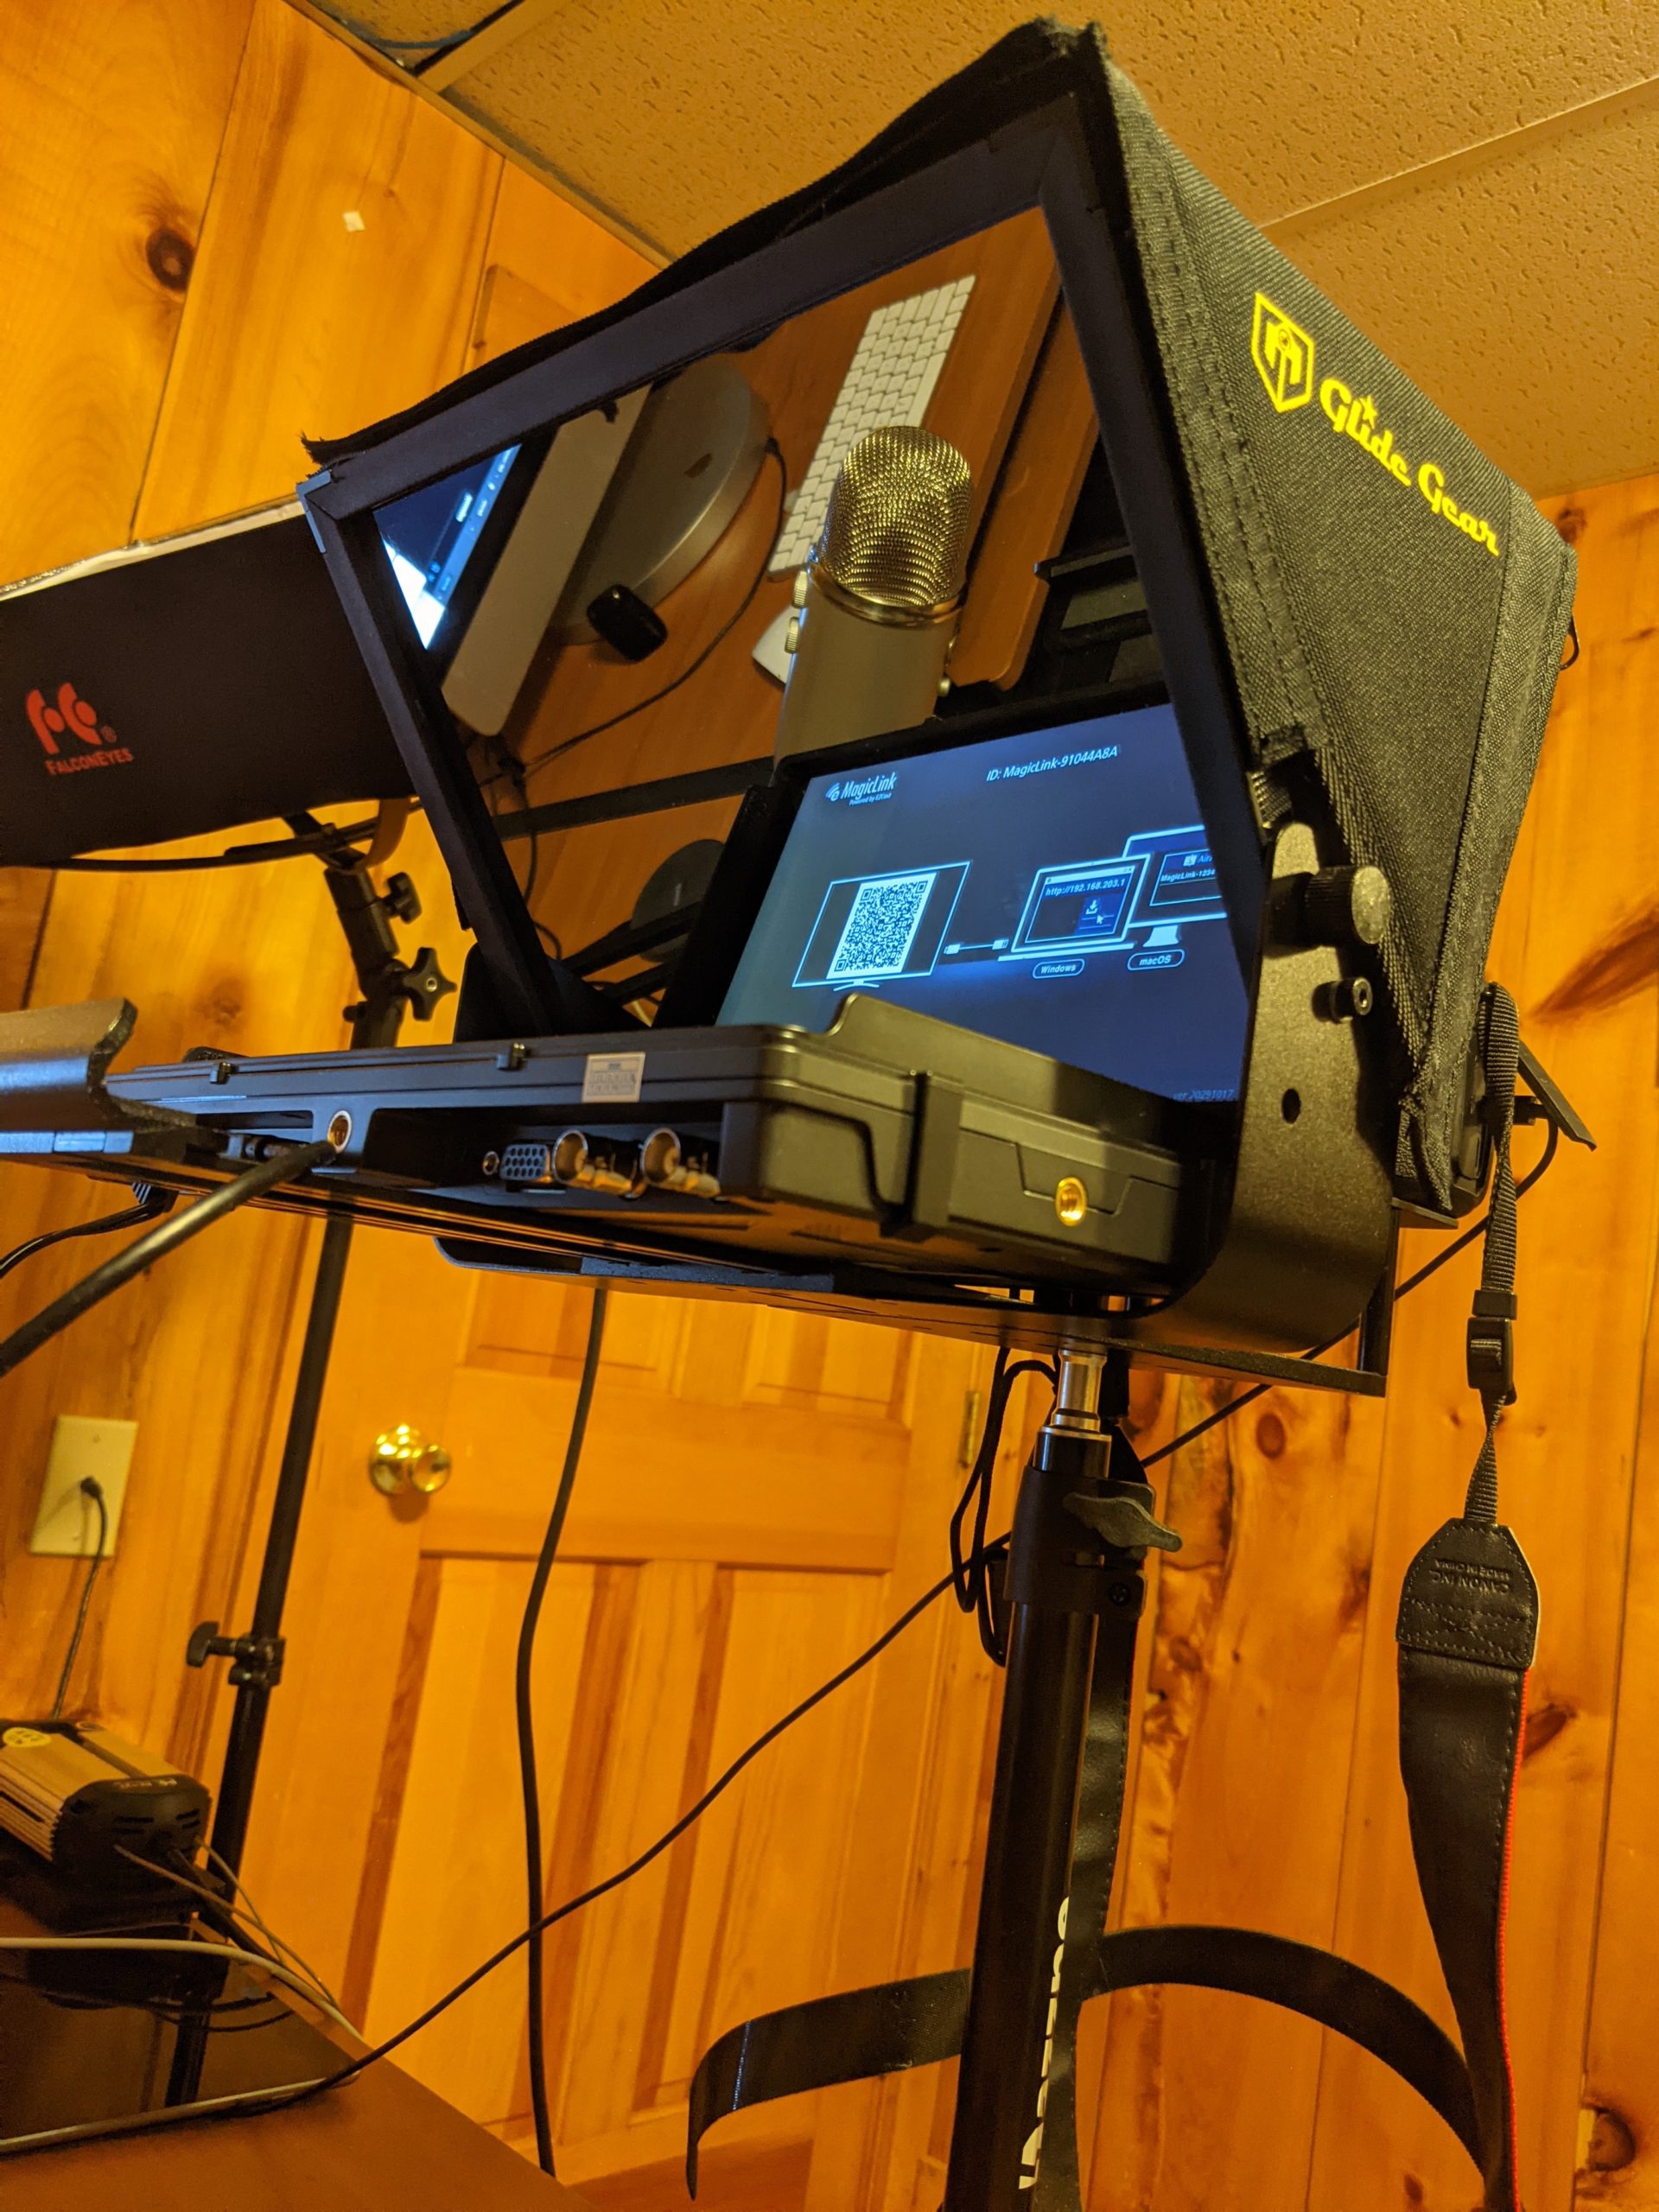
It was also an enormous pain in the ass.
The first question was what to use as a screen. No problem, I thought, I have an iPad. I set one up using Sidecar, then, and pushed slides over to it and was presented with the following:
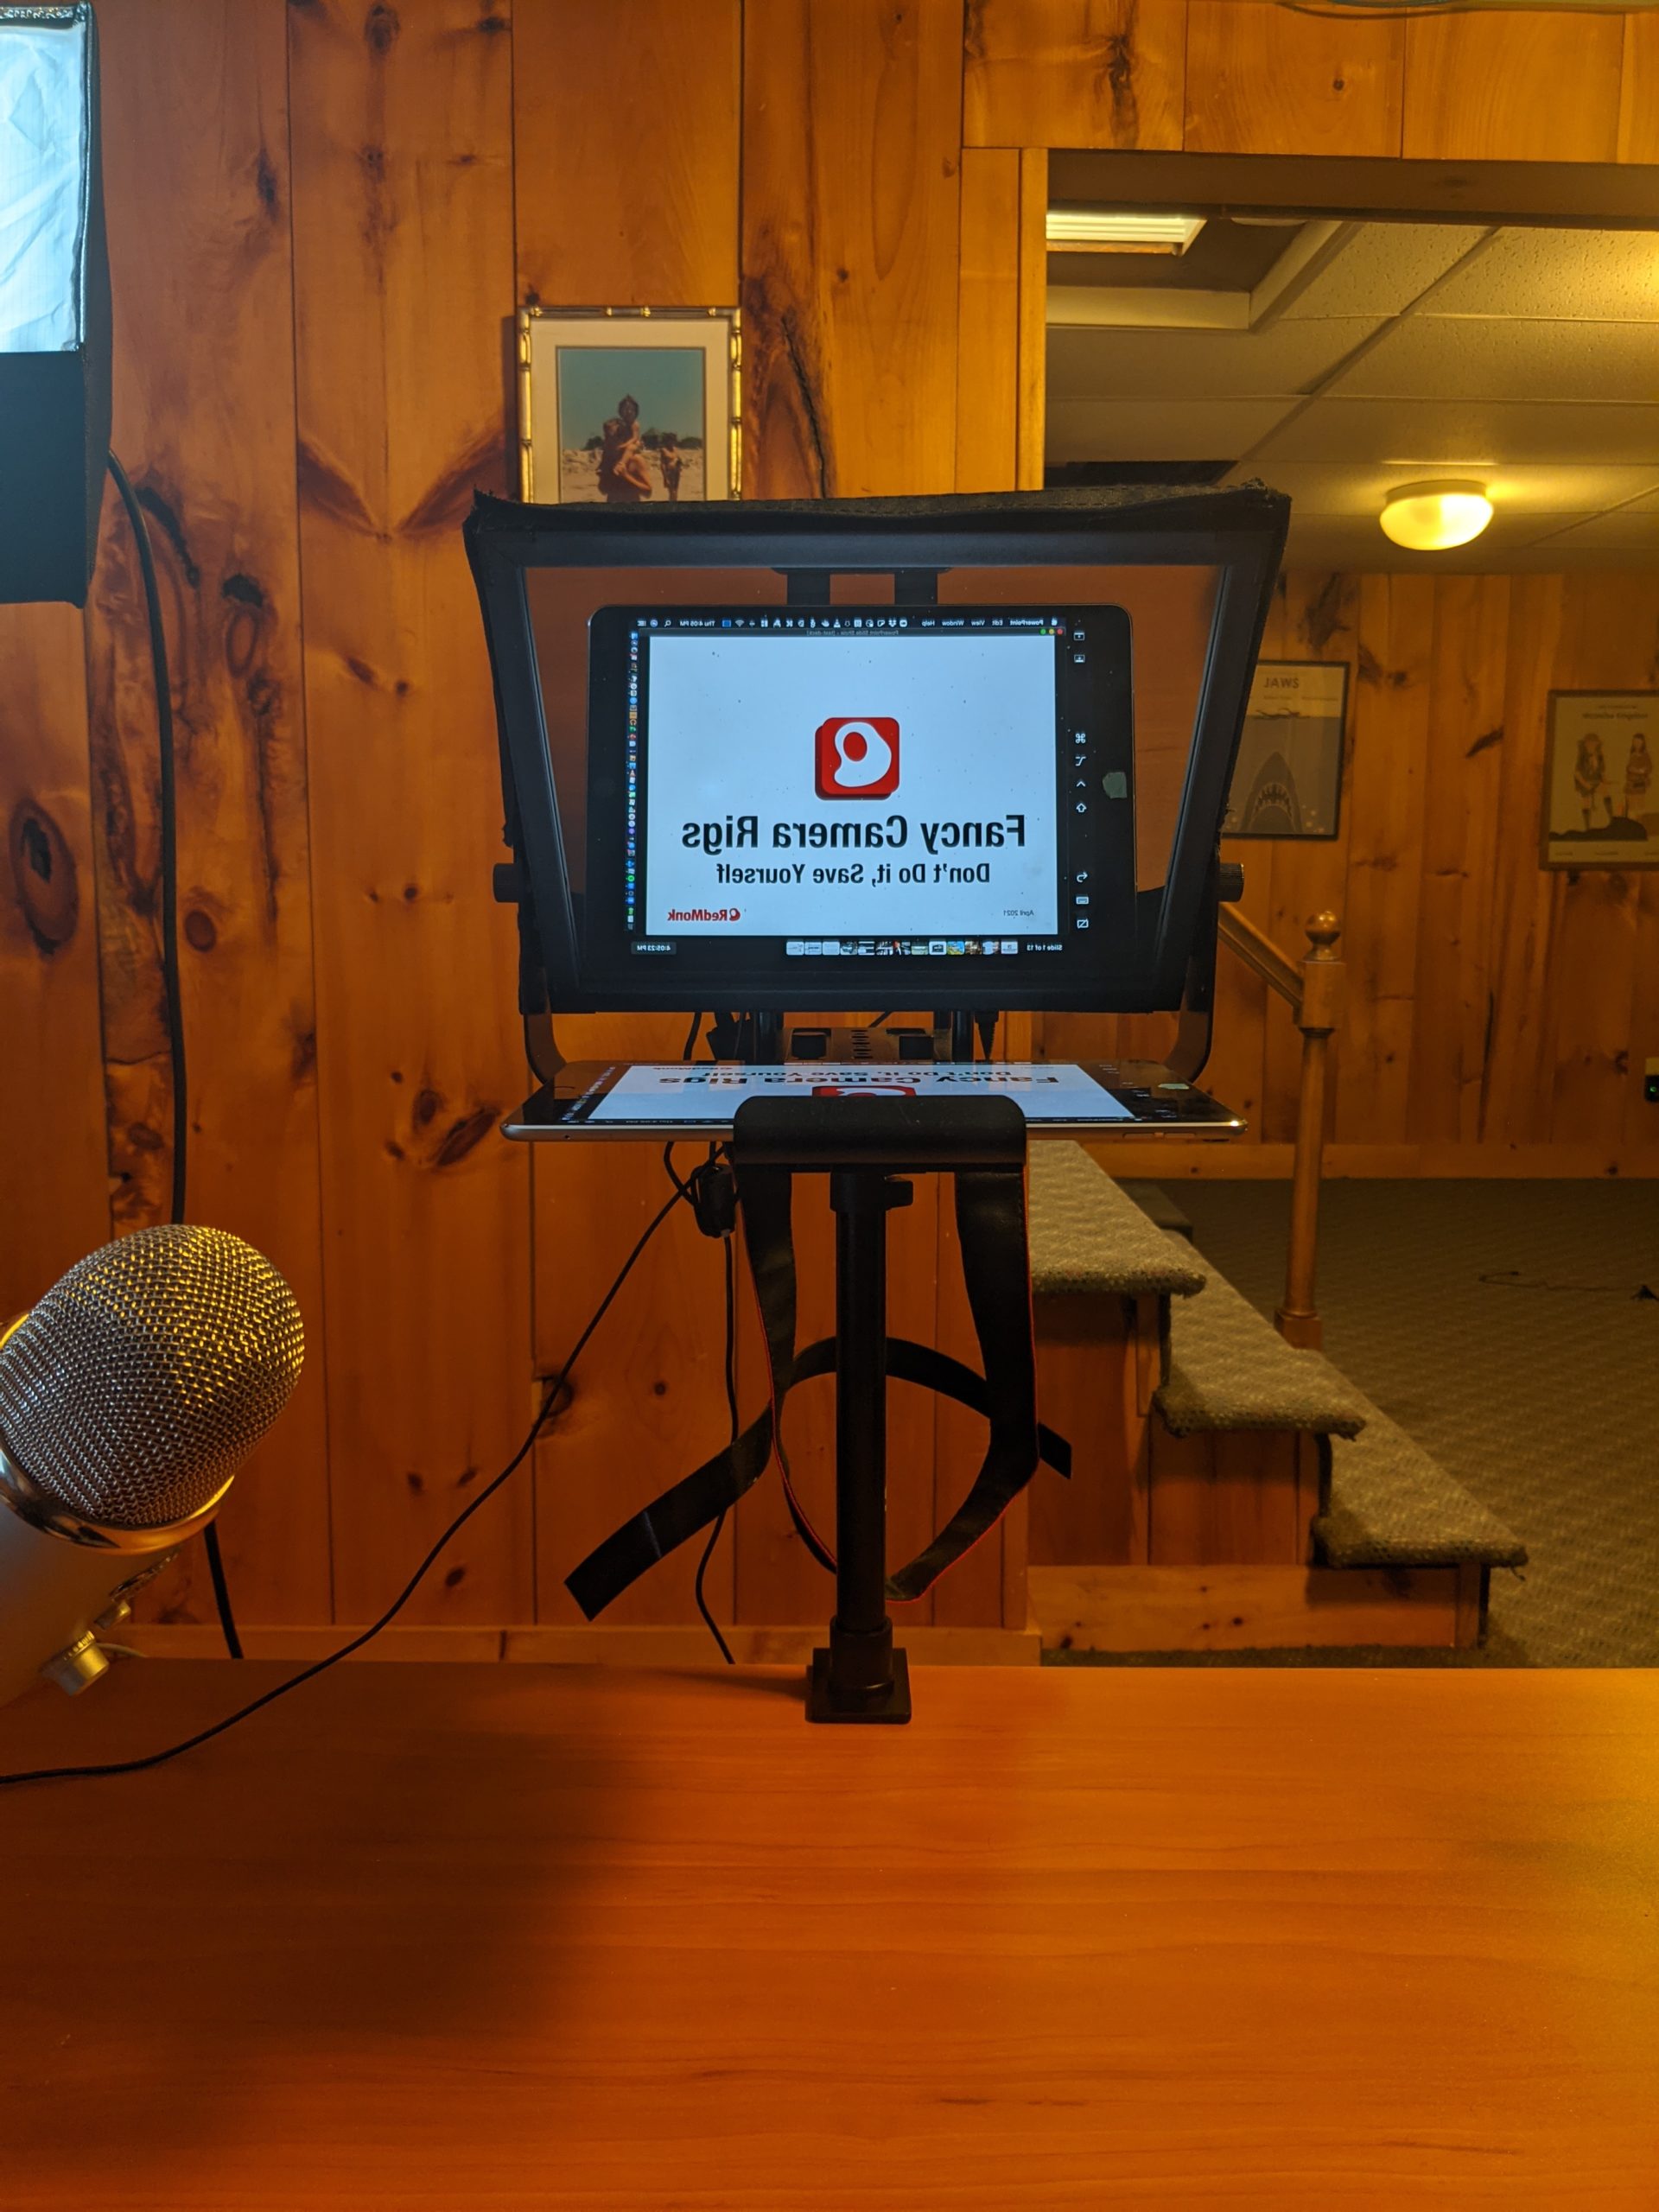
That’s right. I forgot that a mirror would deliver me a mirror image.
Thus it was that I set out to finding a software means to flip an iPad screen, eventually finding one: Avatron Air Display. This worked, in that it would flip the screen, but it was cumbersome to use and at one point it turned my iMac display into a mirror image, which was suboptimal. Eventually I gave up and found hardware that would do it natively. In my case, that was a Lilliput 10.1″ display.
After telling that hardware to flip the image, then, I get this:
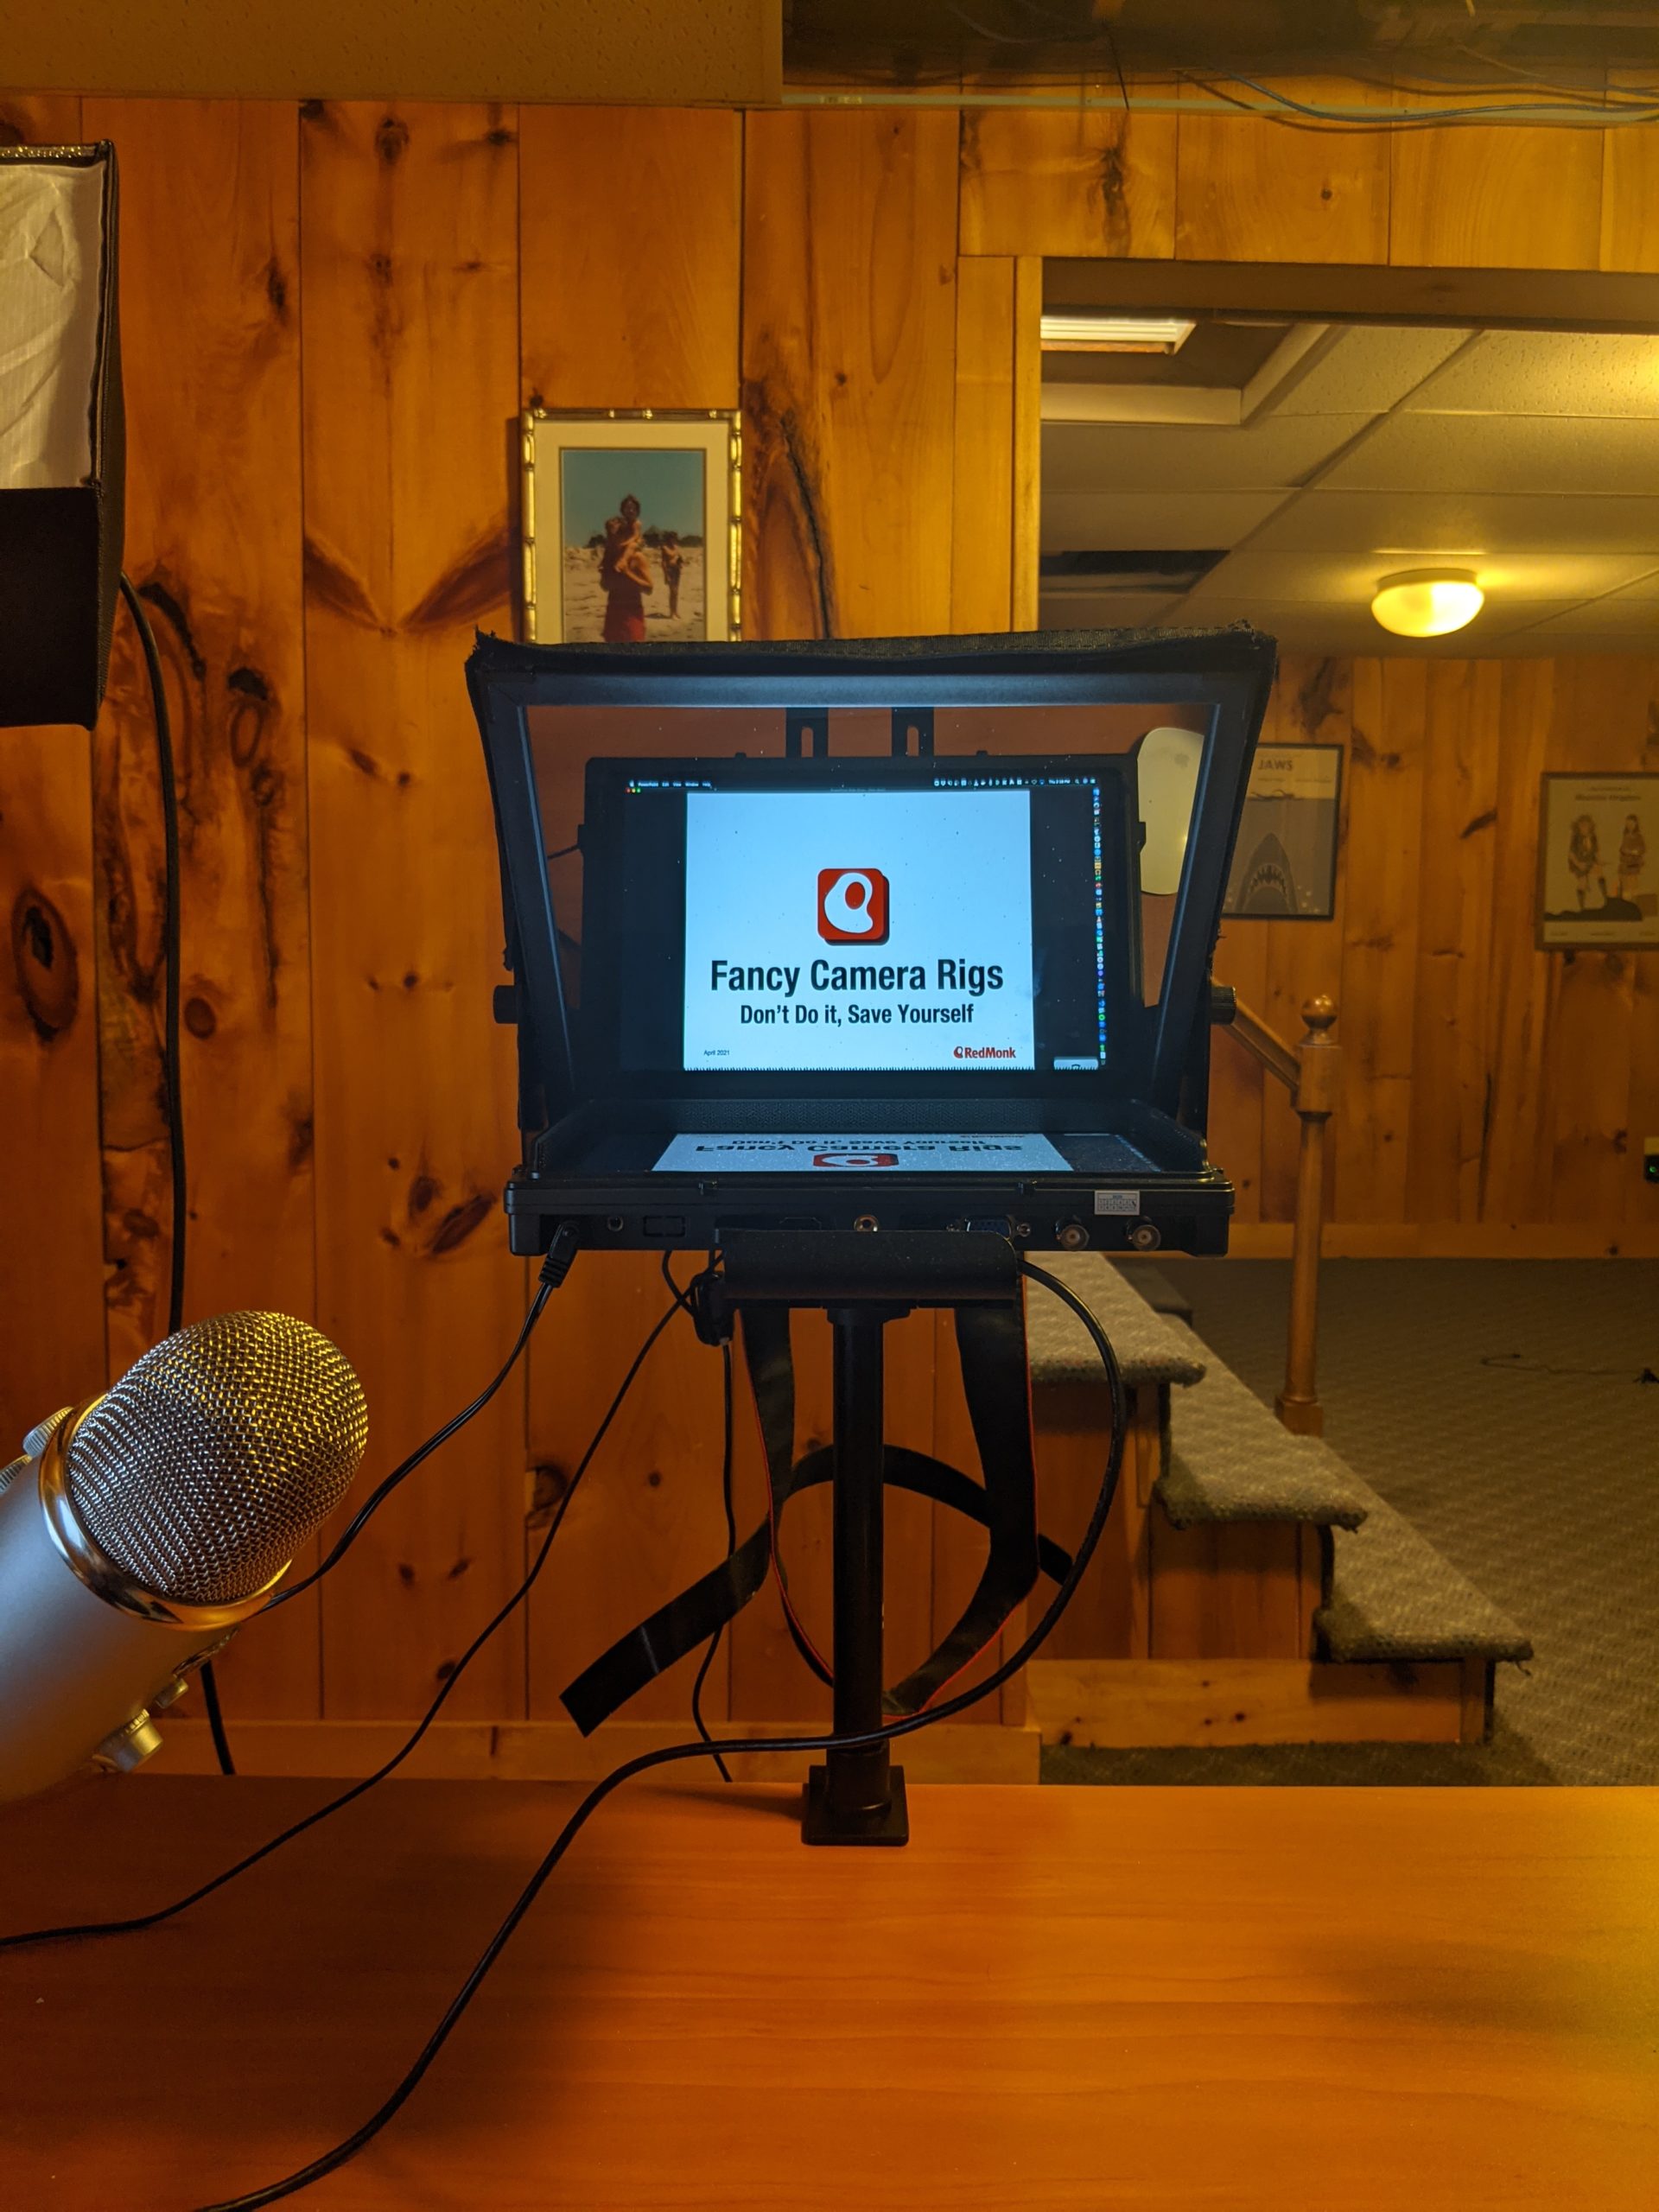
A little more usable. As a side note, a month or two back people on calls with me might have noticed that I was constantly looking down during presentations. That’s because, unable to read mirror image slides, I’d had to spin a second instance of Zoom up on my laptop below the teleprompter to follow along. Good times.
The Desk
The big problem with the desk mounted teleprompter, ultimately, was the fact that I didn’t have a big enough desk for it and my iMac. Nor did I have the footprint in the room to get a wide enough desk to accommodate both. Instead, I picked up a cheap L-desk from Staples, as pictured above.
One side is my desktop, and on the side perpendicular to that I put the teleprompter. This allows me to queue up a call and push it over to the teleprompter, then pivot 45 degrees (on my 20 year old Staples chair) to face the camera with Zoom or an equivalent queued up on the mirrored display.
The Audio
Most people recommend wired audio because of Bluetooth lag issues. That’s most important for my mic, so my voice comes in with no latency, so I took the Blue Yeti mic I already had and dropped it on a cheap boom arm that will swivel between my teleprompter and desktop setup. I don’t do anything fancy for my headset, however. I ultimately ditched my over ear headphones for the aforementioned Jabra Elite 65t headset. The Bluetooth does lead to a little lag in my audio feed, but it’s not sufficiently irritating that I’ve bothered to do anything about it.
I do highly recommend a wired mic, however.
The Lighting
While it’s fair to acknowledge that my lighting situation is challenged by the fact that I have literally zero natural light, the fact is that I have learned virtually nothing about lighting and this is my single biggest remaining issue. I’ve improved the situation somewhat by turning off the warm overhead bulbs and replacing them with a straight LED lightbox setup – a FalconEyes 12, recommended by one of the YouTube videos I watched – but I still have problems with shadows on my face, glare on the non-matte background behind me, and so on. I tried to fix the latter via temporary wallpaper, but it wasn’t as temporary as I’d like. The former I’ve more or less given up on for the present.
The net is that I have no useful lighting advice to provide you, other than a) it’s hard and b) if you have a good natural light situation just use that. There are approximately a billion videos on YouTube about lighting, however, and just because they haven’t worked for my unique circumstances doesn’t mean they won’t work for you.
The Result
In the end, the goal here was to make my appearance more professional, and to the degree that people these days notice my camera set up and ask about it, I have accomplished at least part of that goal.
This is a before shot.

And this is after.
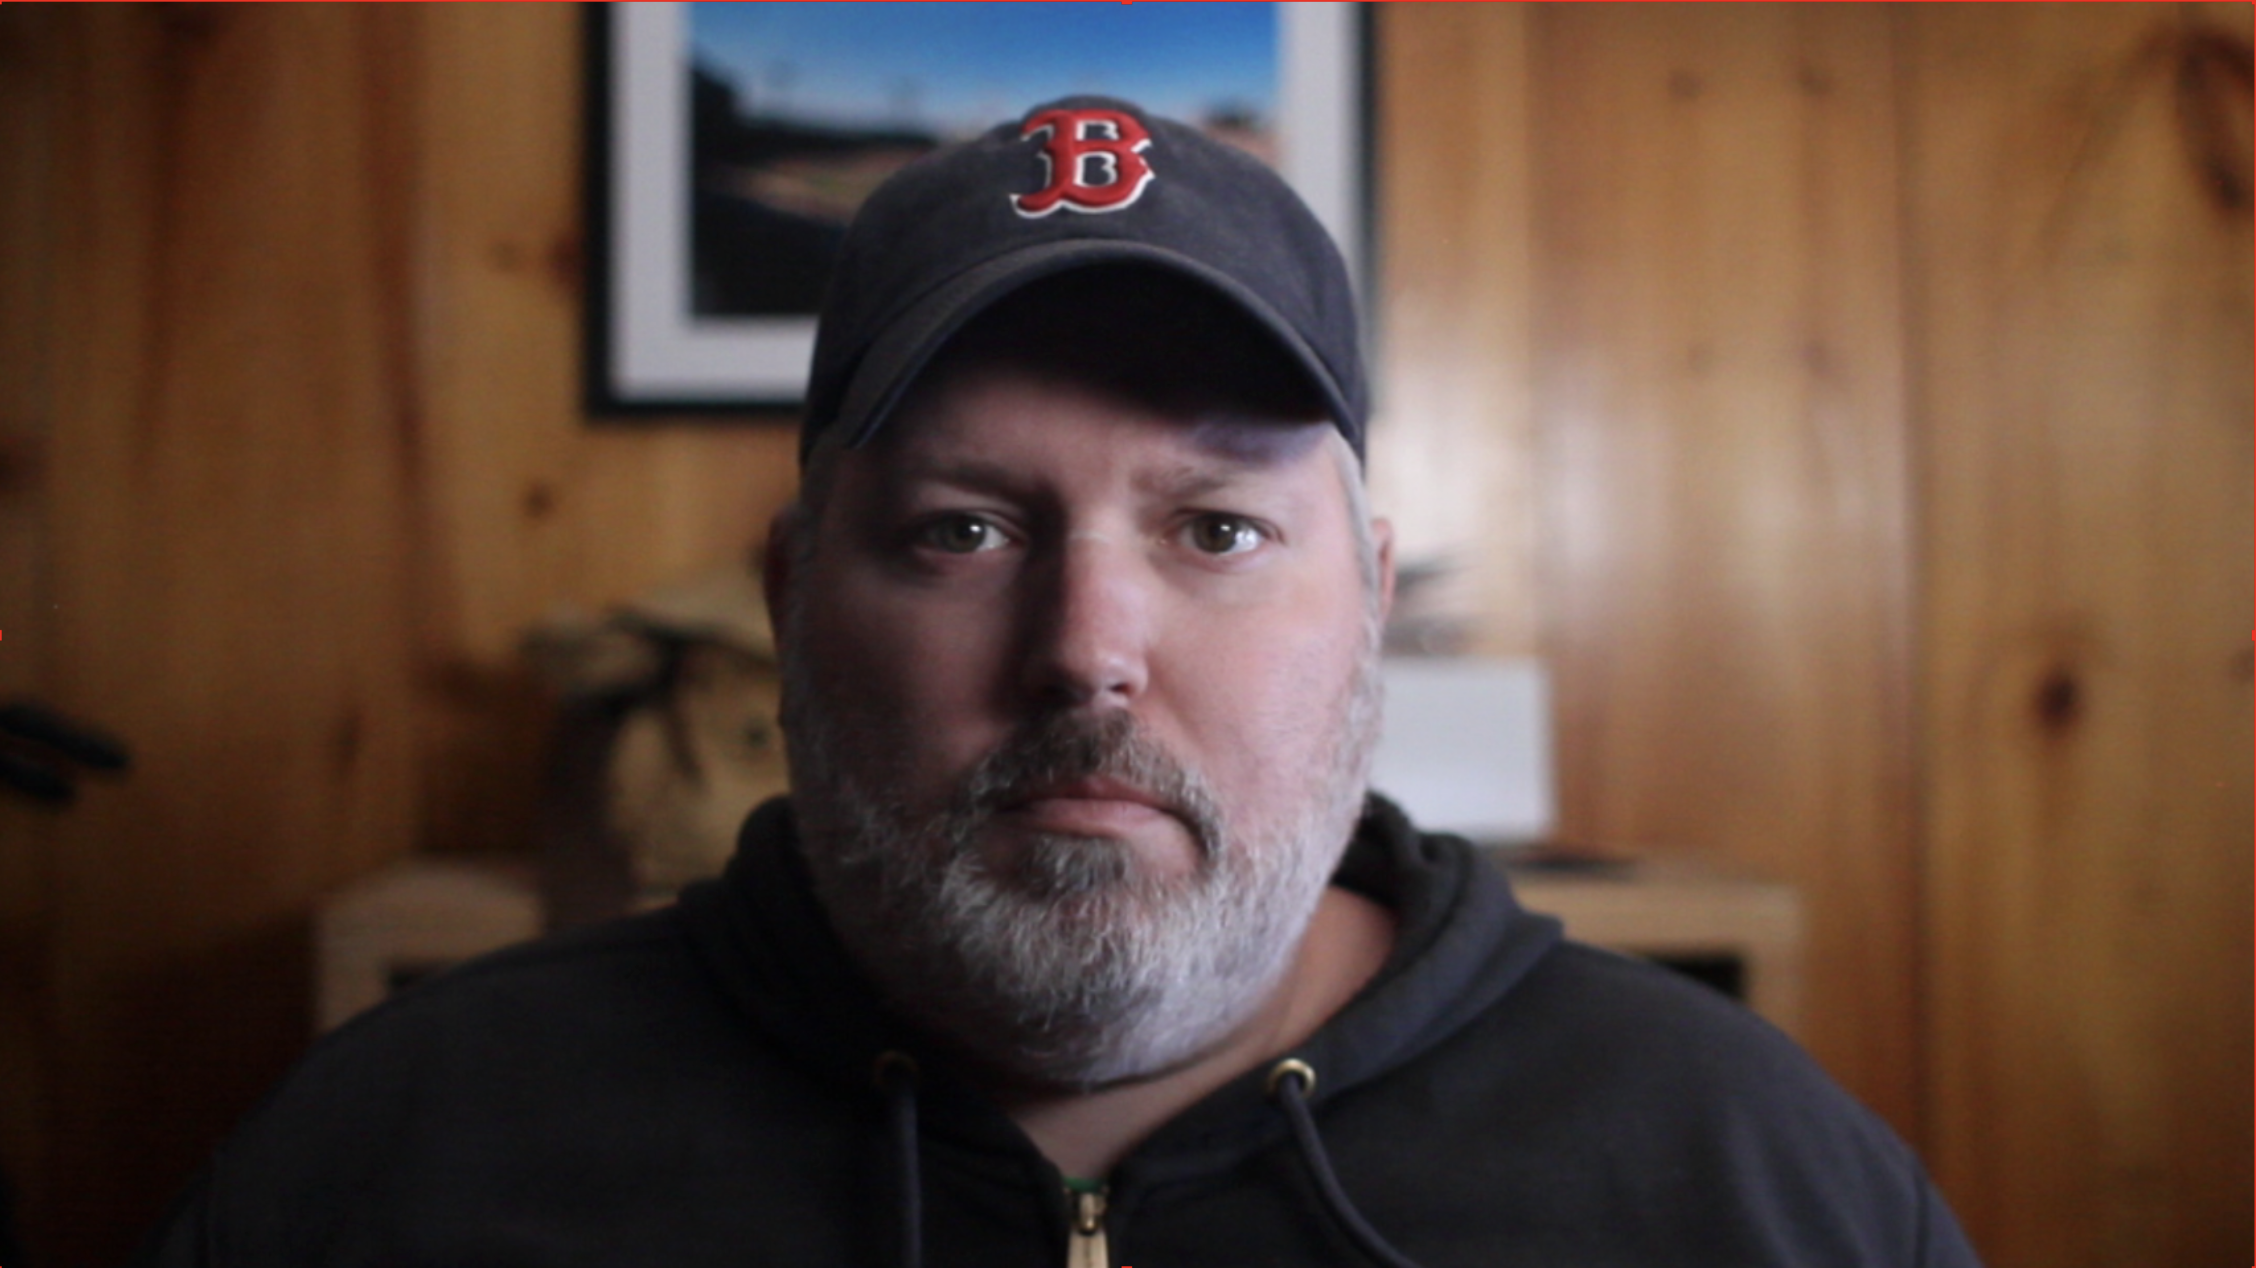
That objectively seems like an improvement. Likewise, I now have a setup in which, particularly for speaking engagements, it’s easy to keep my gaze directly into the camera. As warned above, however, that professional appearance does not come without a cost. These, for example, are the steps I have to go through to use my rig:
- Get up and turn overhead lighting off
- Turn lightbox on
- Turn camera on
- Start video capture
- Check OBS (I usually just leave this running)
- Turn on teleprompter display
- Turn on AirPlay for teleprompter display (which impacts my desktop as Alt-Tab, among other things, now works in the second monitor, not the iMac)
- Start up / join Zoom
- Move Zoom to teleprompter display
- (Optional) Move mouse over to teleprompter display to admit people to Zoom room, change Zoom settings like mute, etc.
And it’s even more complicated than this when I’m the one presenting slides.
When I’m done at the end of the day, I have to remember to reverse the above.
The Annoyances
As mentioned, I’m still looking for a way to set up AirPlay such that it doesn’t pick off Alt-Tab. For some undetermined reason, my Lilliput can only be used over AirPlay – I have thus far been unable to connect it as just a standard second display. I’m replacing the iMac with a Mac Mini which may address this, we’ll see.
Zoom also has a habit of dropping all non-webcam cameras occasionally, which fortunately enough a restart fixes.
The Verdict
Is it worth it? Given that I dutifully go through the complicated steps described above each day, the answer has to be yes. And given that I’m a position where being paid to give talks is part of the job description, I think the efforts to mitigate the challenges of a basement office are worth it professionally speaking.
But, knowing what I know now, would I put up with all of the above if I was just using it as a webcam for internal meetings or similar? Well, if you’ve read this far, you can probably guess the answer to that.

Danno says:
April 23, 2021 at 3:56 pm
I found a cheap solution if you’ve got an iPhone 11+ that works pretty well: Phone mount (mine’s mounted above my screen) and Camo Studio.
Uses the back-facing camera on the iPhone as a webcam. Lighting might still be an issue, but the image quality is *really* good. One drawback is that it can’t use the iPhone’s built in depth sensing algorithms for fake DOF and their software solution ain’t great.
Doug K says:
April 23, 2021 at 6:54 pm
that is wonderfully baroque..
nice picture though, at the end.
I’m on the phone with customers every day. Luckily our issues are technical, so no-one’s interested in looking at faces, we look at the code or the monitoring screens instead.
I use zoom at home a fair bit now, everyone on those calls already expects me to look odd.. my wife got a basic webcam and it’s a lot better than the laptop built-in.